
The SNMP service is not enabled by default in Windows, so it must be manually added. The following sections will explain how to do this in both Windows Server 2003, and in Windows Server 2008 R2. These methods should be adaptable to the corresponding desktop operating systems as well (XP, Vista, 7).
Installing the SNMP service in Windows Server 2003
- Go to:
Control Panel > Add/Remove Programs > Add/Remove Windows Components
- Scroll down, and highlight Management and Monitoring Tools:
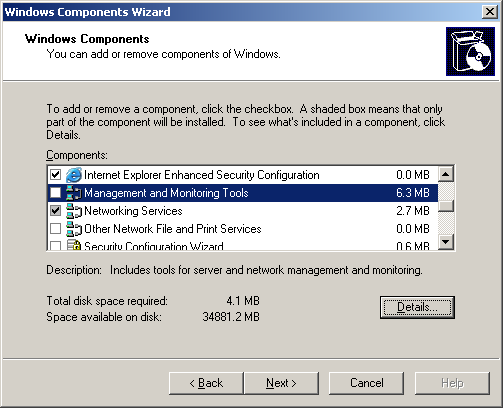
- Click the Details button
- Scroll down, and select Simple Network Management Protocol:

- Click OK, and follow the prompts
- Note: For Server 2003, you will need the installation media for the server to install this feature.
Installing the SNMP service in Windows Server 2008 R2
The process is more streamlined in 2008 R2, and you do not require installation media to add the feature.
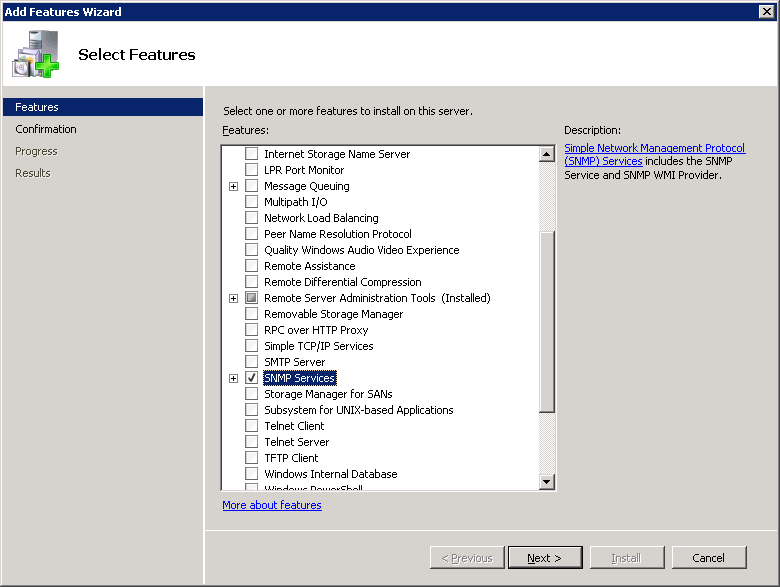
- Go to:
- Server Manager > Features > Add Features
- Scroll down, and select SNMP Services:
- Click Next, and follow the prompts to install
SNMP Service Properties
Now that the service is installed, it must be configured to allow your network monitoring system to access SNMP data.
- Go to:
Services > SNMP Service > Properties
- First, configure the Traps tab:
- Enter the community name, and click Add to list
- Under “trap destinations”, click Add
- Type the FQDN of the network monitoring system
- Click Add
- Now, configure the Security tab:
- Under “Accepted community names”, click Add
- Enter the community name, and make sure READ ONLY is selected
- Click Add
- Under “Accept SNMP packets from these hosts”, click Add
- Type the FQDN of the network monitoring system
- Click Add
- Restart the SNMP service to make sure all the changes are recognized
